Friday, January 18, 2008

Displaying Pdf document in SharePoint Page

Pdf documents can be displayed in SharePoint site with the use of “Content Editor Web part”. To know more about "Content Editor Web part", I suggest you to read this post, where you will get to know about playing a video in SharePoint site.

Add a “Content Editor Web part” to your SharePoint page, Click on the “Open the Tool Pane”, click on “Source Editor” to place the HTML source.
Place the following piece of code in to the Source Editor
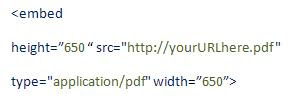


In the above code, “src” points to a source location, the location can be a HTTP or a UNC path. I’ve stored my Pdf document in my document library and used the Http location of my Pdf file. Also Set the Height and Width properties and click on “Ok”.
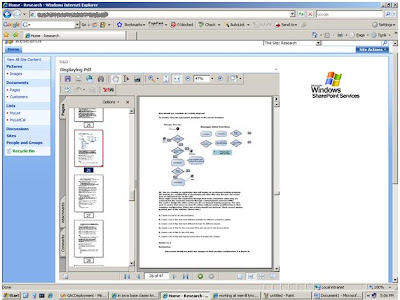


The above image shows the embedded Pdf document to a SharePoint page.

Wednesday, January 16, 2008

Calculated column to display month name from a date

I was haing a requirement to display the month name from the selected date like January, February etc. I have created a calculated column and used a formula to display the month name.

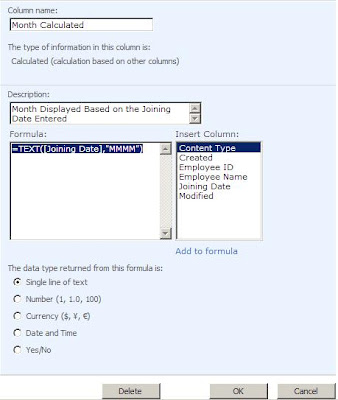
Create a custom SharePoint list and a date column, a calculated column to it and other columns to it. For the demonstration purpose, I have created a list “Employee List”, with “Emp ID”, “Employee Name”, “Joining Date”, and “Month Calculated” columns. Here “Month Calculated” is the Calculated Column.


Above image shows the column details of "Employee List".

In the Calculated Column, use the following formula to get the month name from the “Joining Date” column.


=TEXT([Joining Date],"MMMM") -- To Display “January”, “February”, etc
Or
=TEXT([Joining Date],"MMM") -- To Display “Jan”, “Feb”, etc


Above image shows the “Month Calculated” calculated column.


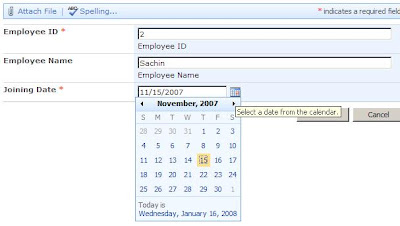
Once the columns added to the List, Add new items by clicking “New”.


After selecting the “Joining Date” Click ok. Now the calculated column will display the month name for the selected “Joining Date”.


Monday, January 7, 2008

Registering Assembly to GAC via Code

Registering Assembly to GAC via Code

As we know to register an assembly toGlobal Assembly Cache, the assembly must be strong named. This strong name is used to prevent spoofing of your code. Use the “gacutil.exe” to install the assembly to the GAC.


Example


gacutil /i MyAssembly.dll


The above command will installs the “MyAssembly.dll” in to the GAC.
See the following code snippet to do the above stuff by C# code.

try
{
string assemblyName = “MyAssembly.dll”;

ProcessStartInfo pStartInfo = new ProcessStartInfo();

//specify gacutil.exe whith which to start the process
pStartInfo.FileName = "gacutil.exe";
pStartInfo.Arguments = string.Format("/i {0}", assemblyName);
pStartInfo.UseShellExecute = false;

//start the process
Process process = Process.Start(pStartInfo);

//wait till the process completes
process.WaitForExit();
}
catch (Exception e)
{
MessageBox.Show(string.Format
("Error registering the assembly :
'{0}'.\n{1}"
, assemblyName, e.Message),
"GAC Installation Error");
}


The “UseShellExecute” property indicates whether to use the operating system shell to start the process. The default is “true”. Set this property to “false” – The process is created directly from the executable file.