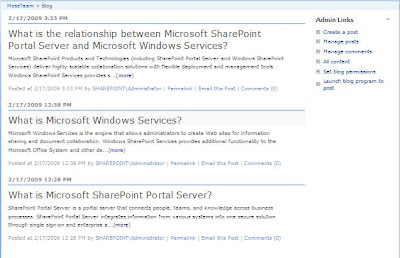
The OOTB posts web part displays complete posts in Home Page (default.aspx) of Blog Site. In this post, the Posts web part is customized to display only 250 characters from each post and a “more” link to the actual blog post instead of displaying complete Blog post in Home Page.
Before Customization
The Posts “ListViewWebPart” displays complete posts in home page.

After Customization
See the below screen, after the customization of Posts Web Part using SharePoint Designer.
See the below screen, after the customization of Posts Web Part using SharePoint Designer.

Approach
Below the approach followed to display 250 characters blog post summary.
1) Convert Posts web part to XSD Data View using SharePoint Designer (SPD)
2) customize the XSL to display 250 characters summary and a “more” link to the actual blog post
3) Create a new Web Part from Customized Post web part and use it in other blog site
The following explains in-detail about the approach.
Creating XSD Data View
Use SharePoint Designer to convert the default list view web part (Posts) to XSD Data View. Open the Blog’s Home Page in your SharePoint Designer. Once the page is opened Right Click the List View Posts web part and select “Convert to XSD Data View”. See the below screen.
Use SharePoint Designer to convert the default list view web part (Posts) to XSD Data View. Open the Blog’s Home Page in your SharePoint Designer. Once the page is opened Right Click the List View Posts web part and select “Convert to XSD Data View”. See the below screen.

Customizing the XSD Data View
The Body column of the Posts list holds the complete summary text. The DataFormWebPart generated by SPD points the list by using the ListID. ListID is nothing but the GUID, which will change server to server. so use ListName instead of ListID to use this web part in blog site of any server.
The Body column of the Posts list holds the complete summary text. The DataFormWebPart generated by SPD points the list by using the ListID. ListID is nothing but the GUID, which will change server to server. so use ListName instead of ListID to use this web part in blog site of any server.
Parameters Generated by SPD

After Change

The “removeHtmlTags” template of XSL used to strip the HTML text from the summary text. See the below screens which shows the XSL customizations.
“removeHtmlTags” Template Definition
“removeHtmlTags” Template Definition
Call “removeHtmlTags” for getting Pure Text
Replace the following section
Replace the following section

by

Now the customizations have been done. Export posts web part and use it in other Blog sites by uploading it to Web Part Gallery.

Reference:
Stripping HTML
http://blog.thekid.me.uk/archive/2007/05/18/stripping-html-tags-when-using-xslt.aspx
Stripping HTML
http://blog.thekid.me.uk/archive/2007/05/18/stripping-html-tags-when-using-xslt.aspx


