Friday, December 5, 2008
Code to remove Web part from a page in SharePoint
Friday, September 19, 2008
Code snippet to get all installed languages from sharepoint server Farm
I had a requirement to display all installed languages of a SharePoint server farm in a DropDownList.
Regional Settings of SPWeb has a property named "SPWeb.RegionalSettings.InstalledLanguages", which returns language collection of type
"SPLanguageCollection". The following are the properties of "SPLanguage" instance.

Use the "Display Name" property to get the language display name ex. English and "LCID" property to get the locale ID ex. 1033(for English).
See the below code snippet, which will be used to get the installed languages from a SharePoint server farm.

Hope this will be helpful
Thursday, July 17, 2008
Programmatically uploading site templates to site template gallery

This code uses a configuration file, which has a custom section called “SiteTemplatesSection”. This custom section holds the physical path of each site template.
Friday, July 4, 2008
Programmatically Creating Site Collection in SharePoint
1) Using SharePoint Object Model
2) Using Central Admin’s Admin Web Service
Creation Site Collection using SharePoint Object Model
See the following code snippet, which uses SharePoint Object Model to create site collection.

The Admin Web Service of Central Admin has the following web methods

Thursday, May 29, 2008
Programmatically adding data to SharePoint List’s Choice column
- Dropdown List
- Radio Buttons
- Check Boxes (To Select Multiple Items)
Consider I’ve a list “Resource List” with following columns
Column Name ------ Type
Resource Name --> Single Line of Text
Languages Known --> Choice (C#, VB.NET, Java, C, C++) – Multiselect
“Languages Known” is the CHOICE field (Check Boxes), to select multiple languages known by the resource.When adding new items to the Resouce List, notice that multiple items selected for the ‘Languages Known’ CHOICE column will be seperated by semi colan(‘;’).
I had a requirement to add the list item by code. I have used “ChoiceA;ChoiceB;..ChoiceN” for storing the ListItem’s multi-select CHOICE field. After adding ListItem by code, I have Edited the newly added item in the browser, but no check box has been selected for the item which was added by code.
Then after a little effort I found that the multi-select CHOICE data is stored as “;#ChoiceA;#ChoiceB;#...;#”
See the below code for adding listitem to Resource List.
Below screen shows the newly added Item in the edit mode
Friday, April 4, 2008
Page Hit Counter in SharePoint
Open your site or your sites Master page to insert this component. For the demonstration purpose, I’ve use my default.aspx to insert the “Hit Counter” component. Once the page is opened in SharePoint Designer, place the cursor where you want to insert the hit counter. Go to Insert --> Web Component.
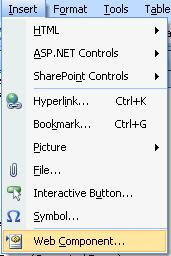
Click on the Web Component, this will display the available web components. You can find different types of other components readily available.
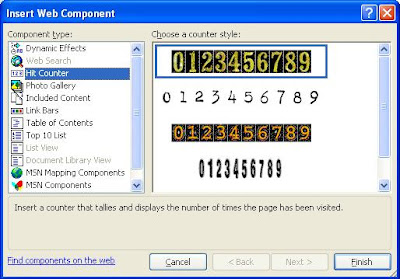
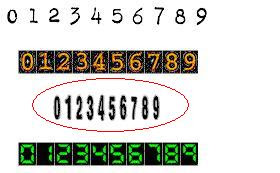
Click on the Hit Counter component, this will display different counter styles. Select any one style from the list. I have selected the below marked style.
Click on “Finish”, this will open the below Hit Counter Properties window.
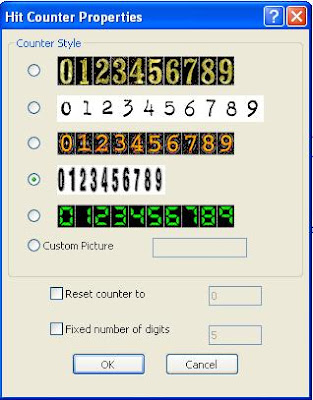
You can even create your own Hit Counter. Use “Reset counter to” to reset the counter from a given number. To display fixed number of digits use “Fixed number of digits” property. Click on “Ok”, the hit counter will be inserted to your page. The below code will be inserted in your page to display the counter.

Now, preview your page from SharePoint Designer / a Web browser. You can see the Hit Counter incremented for each hit.

You can see the Hit Counter increments for each hit.
Tuesday, March 4, 2008
Creating SharePoint List using Office Excel

Thursday, February 7, 2008
Windows UI for STSADM
See this post to download, to know more about STSADMWin utility.
Friday, January 18, 2008
Displaying Pdf document in SharePoint Page
Add a “Content Editor Web part” to your SharePoint page, Click on the “Open the Tool Pane”, click on “Source Editor” to place the HTML source.
Place the following piece of code in to the Source Editor
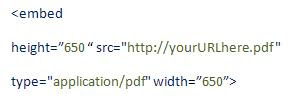
In the above code, “src” points to a source location, the location can be a HTTP or a UNC path. I’ve stored my Pdf document in my document library and used the Http location of my Pdf file. Also Set the Height and Width properties and click on “Ok”.
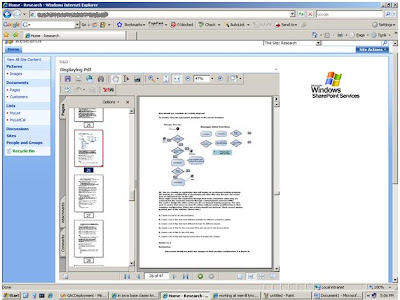
The above image shows the embedded Pdf document to a SharePoint page.
Wednesday, January 16, 2008
Calculated column to display month name from a date
Create a custom SharePoint list and a date column, a calculated column to it and other columns to it. For the demonstration purpose, I have created a list “Employee List”, with “Emp ID”, “Employee Name”, “Joining Date”, and “Month Calculated” columns. Here “Month Calculated” is the Calculated Column.

Above image shows the column details of "Employee List".
In the Calculated Column, use the following formula to get the month name from the “Joining Date” column.
=TEXT([Joining Date],"MMMM") -- To Display “January”, “February”, etc
Or
=TEXT([Joining Date],"MMM") -- To Display “Jan”, “Feb”, etc
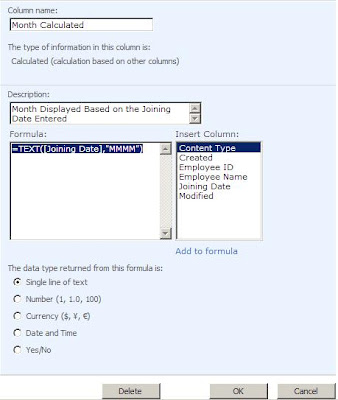
Above image shows the “Month Calculated” calculated column.
Once the columns added to the List, Add new items by clicking “New”.
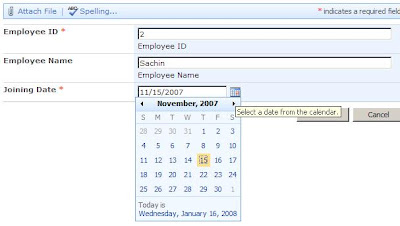
After selecting the “Joining Date” Click ok. Now the calculated column will display the month name for the selected “Joining Date”.

Monday, January 7, 2008
Registering Assembly to GAC via Code
Registering Assembly to GAC via Code
As we know to register an assembly toGlobal Assembly Cache, the assembly must be strong named. This strong name is used to prevent spoofing of your code. Use the “gacutil.exe” to install the assembly to the GAC.
Example
gacutil /i MyAssembly.dll
The above command will installs the “MyAssembly.dll” in to the GAC.
See the following code snippet to do the above stuff by C# code.
try
{
string assemblyName = “MyAssembly.dll”;
ProcessStartInfo pStartInfo = new ProcessStartInfo();
//specify gacutil.exe whith which to start the process
pStartInfo.FileName = "gacutil.exe";
pStartInfo.Arguments = string.Format("/i {0}", assemblyName);
pStartInfo.UseShellExecute = false;
//start the process
Process process = Process.Start(pStartInfo);
//wait till the process completes
process.WaitForExit();
}
catch (Exception e)
{
MessageBox.Show(string.Format("Error registering the assembly :
'{0}'.\n{1}", assemblyName, e.Message),
"GAC Installation Error");
}
The “UseShellExecute” property indicates whether to use the operating system shell to start the process. The default is “true”. Set this property to “false” – The process is created directly from the executable file.


